




I'm here! And there. Two places where I've shown up recently that you might want to check out:
Learning a Latte - I guest posted here yesterday about how we incorporate Montessori concepts in our daily play/homeschooling. It was fun to write! She has had guest posts all week with a different style highlighted each day, so be sure to head over if you're interested in homeschooling at all. Fun reads.
Just Make it a Double - We're baaaaaack! Remember how Amy and I posted a picture a day and then we fell off of the planet during the summer and you had to look at the same picture every day since June 22nd? *and inhaaaaale!* Well, we're back! And we'll be posting every day barring loss of limb or internet service ;)
And of course, I'm back here on a sporadic basis. Check out the giveaway from Tuesday and enter already. Otherwise, gear up for a fall full of fun. (Check out that alliteration! uh huh!) 'Cause fun is my middle name. Or not. But my kids are funny, so I'll write about that.
Showing posts with label Photography. Show all posts
Showing posts with label Photography. Show all posts
Thursday, September 9, 2010

Monday, July 19, 2010
I Heart Faces - Over My Head

Genelle and Anne have gotten me interested in this site for their weekly photo contest, (turns out, the site is pretty darn cool aside from that, anyway).
So, here's my entry for this week's challenge: "Over My Head"

I've got some time this week, so expect regular blogging to commence!
Monday, July 12, 2010
Americana
Snowballs...


Silly faces...


And so excited to see the fireworks that Mama was the one having to keep up.


(Poor Sayer... he was on me... no pictures of him. Cobbler's kids or something like that...)
*this was for you, Robin :)
Saturday, June 26, 2010
Silly Is As Silly Does
The girls have been running around wearing a pair of sunglasses that were missing a lens. I decided to pop the other lens out and add the frames to the dress-up box. Instant hit. So much so that we all joined in on the action. Enjoy a glimpse of our fun:


We're a little quirky... but we like it that way :)



















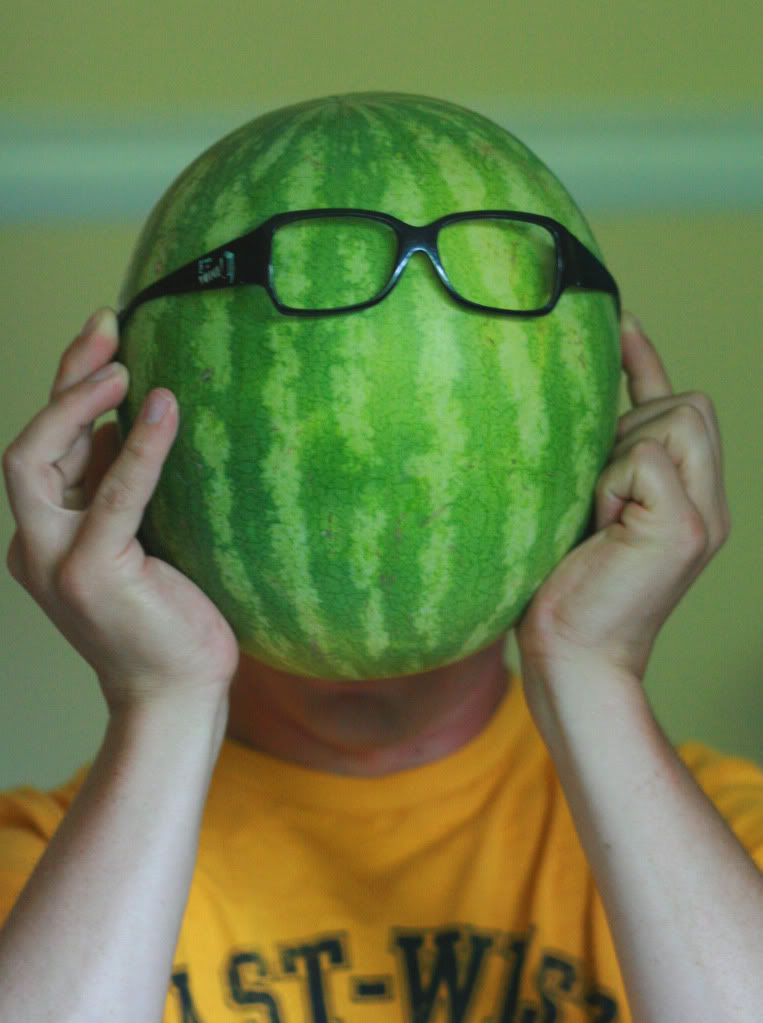
We're a little quirky... but we like it that way :)
Monday, March 8, 2010
Photo Class - Episode 3!
This week's photo assignment on Amy's blog was "Checking Your Corners." All too often, pictures are plagued by clutter. Whether it's crazy Aunt Edna's wig sticking up in the corner or the tree that looks like it's growing out of your kid's head, clutter happens in pictures A LOT.
I have to admit, I purposely shoot with a smaller f-stop so that my depth of field is small enough to obscure the things in the background.
Because hey, let's face it, I have three kids. There's a lot of background stuff.
Anyway, the purpose of this assignment was to shoot purposefully in such a way that there are no distractions from the focal point in your shot.
Here goes!

Taken with a Canon Rebel XTi
Focal Length: 50mm
Shutter Speed: 1/100
Aperture: f/3.2
ISO: 800

Taken with a Canon Rebel XTi
Focal Length: 50mm
Shutter Speed: 1/125
Aperture: f/3.2
ISO: 800
If you like taking pics, definitely join in next class on Amy's blog!
I have to admit, I purposely shoot with a smaller f-stop so that my depth of field is small enough to obscure the things in the background.
Because hey, let's face it, I have three kids. There's a lot of background stuff.
Anyway, the purpose of this assignment was to shoot purposefully in such a way that there are no distractions from the focal point in your shot.
Here goes!

Taken with a Canon Rebel XTi
Focal Length: 50mm
Shutter Speed: 1/100
Aperture: f/3.2
ISO: 800

Taken with a Canon Rebel XTi
Focal Length: 50mm
Shutter Speed: 1/125
Aperture: f/3.2
ISO: 800
If you like taking pics, definitely join in next class on Amy's blog!
Thursday, February 18, 2010
Honey Baked Lentils

What do we have here? Looks a bit like bird seed, and perhaps a smidgen like disgruntled peas. In short, doesn't look like much, does it?
But dang, it tastes delicious.
Honey Baked Lentils! I pulled the recipe from a friend's blog and tweaked it a bit to serve our little family. Here's my version
Honey Baked Lentils
1 cup lentils
2 cups water
2 and a half tbsp honey
2 tbsp soy sauce
2 tbsp coconut oil
1/2 tsp ginger
1 small onion, chopped
2 cloves garlic, minced or pressed
Combine the above in a baking dish, cover and bake at 350* until tender. (About an hour and 15 minutes, here).
The original called for olive oil instead of coconut oil, but we're out and actually, I thought that the coconut flavor would be a nice accent to the honey and the nutty flavor of the lentils. I also added a bit more honey and a bit more garlic.

Initially, I was nervous at how the kids would take to the onions but we have so many dang onions floating around our fridge from the CSA, I couldn't leave it out.
And really, my worries were unfounded. It might not look like much, (and really, it TOTALLY contradicts my usual attempts to feed first with the eyes, then with the mouth), but it tasted delicious.

And it's super healthy. Lentils are an excellent source of both fiber and protein. (The latter being especially important for the vegetarians/vegans). Lentils also have a LOT of iron, which, for anemic people, (as I am when pregnant), is great.
Anyway, I guess the moral of the story is that pretty doesn't always equal tasty, and tasty definitely doesn't always equal pretty. It's nice when they mesh, but if given a choice? I'd rather my food taste good. My kids do too, apparently. They loved it too :) Let me know if you try it!
Saturday, February 13, 2010
Photo Class - Episode 2!
This week, photo class on Amy's blog focused on light and how to manipulate the settings on the camera to achieve the ideal lighting to make a great picture. While ISO, aperture and shutter speed can be manipulated to get some incredible effects, the focus this time was to adjust the settings to compose a balanced picture.
I've been too chicken to shoot completely manually, (I'm afraid of missing moments that I could have captured because of goofed up settings), so I've been shooting either in aperture priority (Av) or shutter priority (Tv). I've been trying to pay attention to what the settings adjust to when I change the aperture or the shutter speed. I definitely think this will help me on those, (hopefully more frequent), instances when I shoot fully manual.
Anyway, here are a few shots that are straight out of the camera that really exhibit good lighting, (in my humble, non-photographer's opinion). Enjoy!

Focal Length: 50mm
Shutter Speed: 1/160
Aperture: f/1.8
ISO: 400
Mode: Av

Focal Length: 50mm
Shutter Speed: 1/40
Aperture: f/2.5
ISO: 200
Mode: Av

Taken with a Canon Rebel XSi
Focal Length: 35mm
Shutter Speed: 1/80
Aperture: f/2.5
ISO: 400
Mode: Av
None of these pictures are perfect compositions, but in each, the lighting adds an element of interest. The first two really highlight the kids' eyes which immediately makes them the focal point in the pictures. (Which is a good thing, especially in the second picture because then you probably don't notice the random apple hunk trying to attack my kid's face right away... this picture could really benefit from a good crop). The third picture isn't focused quite as sharply as I would have liked, but I like the way the soft lighting captures the deep colors in my niece's (unusually serious) face.
Anyway, that's my humble contribution to this week's class. :)
I've been too chicken to shoot completely manually, (I'm afraid of missing moments that I could have captured because of goofed up settings), so I've been shooting either in aperture priority (Av) or shutter priority (Tv). I've been trying to pay attention to what the settings adjust to when I change the aperture or the shutter speed. I definitely think this will help me on those, (hopefully more frequent), instances when I shoot fully manual.
Anyway, here are a few shots that are straight out of the camera that really exhibit good lighting, (in my humble, non-photographer's opinion). Enjoy!

Focal Length: 50mm
Shutter Speed: 1/160
Aperture: f/1.8
ISO: 400
Mode: Av

Focal Length: 50mm
Shutter Speed: 1/40
Aperture: f/2.5
ISO: 200
Mode: Av

Taken with a Canon Rebel XSi
Focal Length: 35mm
Shutter Speed: 1/80
Aperture: f/2.5
ISO: 400
Mode: Av
None of these pictures are perfect compositions, but in each, the lighting adds an element of interest. The first two really highlight the kids' eyes which immediately makes them the focal point in the pictures. (Which is a good thing, especially in the second picture because then you probably don't notice the random apple hunk trying to attack my kid's face right away... this picture could really benefit from a good crop). The third picture isn't focused quite as sharply as I would have liked, but I like the way the soft lighting captures the deep colors in my niece's (unusually serious) face.
Anyway, that's my humble contribution to this week's class. :)
Wednesday, February 10, 2010
Bagels Bagels BAGELS
I love me some bagels. I do NOT love old bagels, bagels that are hard, bagels that taste like shoe leather, and bagels full of preservatives and other nonsense.
That doesn't leave much in the way of good bagels. After all, we don't live in New York. The bagels that are good often cost an arm and a leg, and frankly? Shaun would kill me if I fueled my bagel habits as often as I'd like.
So, I took matters into my own hands... quite literally. It's bagel makin' time, people!
Here's the rundown:

Mix together until all flour is mixed into dough. You can add a bit more water if necessary. When the dough forms a ball, take it out of the bowl and place onto a lightly floured counter top.

Knead the dough until there are no longer any lumps and the dough starts getting a bit more elastic. This took me about 4 minutes of hard kneading. Separate the dough into 8 uniform pieces. Set these aside and allow to rest for about 15 minutes. Preheat the oven to 425 degrees.
Now comes the playdough-ish fun. Take a ball of dough and roll it into a snake on the countertop. When the dough is long enough to wrap around your hand, place the two ends under your palm and fingers and roll until they fuse together. This was harder than I expected. I had a hard time getting a uniform thickness throughout. Towards the end, I started thinning out the middle of the "snake" and that seemed to help a bit when the fused ends got skinny as well.

Let the dough bagels rest on the counter for 15-20 minutes. In the meantime, put a large pot of water on the stove to boil and lightly grease a cookie sheet.

Once your bagels start looking puffy, you need to boil them. Drop a bagel into the pot of boiling water and allow it to pop around for about 2 minutes. You'll notice the bagel start to puff and change. Take it out with a slotted spoon or sieve and let it drip for a few seconds.

I chose to make our bagels into cinnamon-sugar bagels, so right after they came out of the boiling water, I dropped them onto a saucer of mixed cinnamon and sugar. Then I placed the bagels sugared side up on a lightly greased cookie sheet.

Once you get the bagels on the cookie sheet, pop them into the oven for about 8 minutes. (I have a convection oven and 8 minutes was PLENTY... according to the recipe I used, it should be 10 minutes, so watch your bagels and judge for yourself). The bagels will puff bigger and start to look a bit shiny.

After 8 minutes, flip them and put back into the oven for another 8 or so. (I actually wasn't 100% convinced this was necessary and might try to omit this step next time).

Pull the beautiful bagels out of the oven, let cool for about 20 minutes, and then, smear with your favorite spread and enjoy!

You can add to the recipe with pretty much anything you want... blueberries, sesame seeds, chocolate chips, etc.
I used the following recipe and it was fantastic. (Pay attention to the bagel rolling video if that part gives you trouble). Let me know if you try it and what toppings or mixes you use!
(I'm not going to lie... I'm totally going to eat one now).
That doesn't leave much in the way of good bagels. After all, we don't live in New York. The bagels that are good often cost an arm and a leg, and frankly? Shaun would kill me if I fueled my bagel habits as often as I'd like.
So, I took matters into my own hands... quite literally. It's bagel makin' time, people!
Here's the rundown:
- 4 cups of bread flour (bread flour has more gluten which yields fluffier breads, etc... it's worth it to go for the bread flour, but if you don't have it on hand, I can't imagine it would ruin the bagels completely).
- 1 tablespoon of sugar
- 1 and 1/2 teaspoons of salt
- 1 tablespoon of vegetable oil
- 2 teaspoons of instant yeast (almost all yeast that you can buy in the grocery store is apparently instant yeast... this cuts down on the need to "proof" the yeast before attempting the rest of your recipe).
- 1 and 1/4 cups of warm water. (make sure this is a smidgen more than room temperature, but definitely not hot... this is your yeast's jump start).
- Optional - cinnamon and sugar, chocolate chips, sesame seeds, blueberries, etc.

Mix together until all flour is mixed into dough. You can add a bit more water if necessary. When the dough forms a ball, take it out of the bowl and place onto a lightly floured counter top.

Knead the dough until there are no longer any lumps and the dough starts getting a bit more elastic. This took me about 4 minutes of hard kneading. Separate the dough into 8 uniform pieces. Set these aside and allow to rest for about 15 minutes. Preheat the oven to 425 degrees.
Now comes the playdough-ish fun. Take a ball of dough and roll it into a snake on the countertop. When the dough is long enough to wrap around your hand, place the two ends under your palm and fingers and roll until they fuse together. This was harder than I expected. I had a hard time getting a uniform thickness throughout. Towards the end, I started thinning out the middle of the "snake" and that seemed to help a bit when the fused ends got skinny as well.

Let the dough bagels rest on the counter for 15-20 minutes. In the meantime, put a large pot of water on the stove to boil and lightly grease a cookie sheet.

Once your bagels start looking puffy, you need to boil them. Drop a bagel into the pot of boiling water and allow it to pop around for about 2 minutes. You'll notice the bagel start to puff and change. Take it out with a slotted spoon or sieve and let it drip for a few seconds.

I chose to make our bagels into cinnamon-sugar bagels, so right after they came out of the boiling water, I dropped them onto a saucer of mixed cinnamon and sugar. Then I placed the bagels sugared side up on a lightly greased cookie sheet.

Once you get the bagels on the cookie sheet, pop them into the oven for about 8 minutes. (I have a convection oven and 8 minutes was PLENTY... according to the recipe I used, it should be 10 minutes, so watch your bagels and judge for yourself). The bagels will puff bigger and start to look a bit shiny.

After 8 minutes, flip them and put back into the oven for another 8 or so. (I actually wasn't 100% convinced this was necessary and might try to omit this step next time).

Pull the beautiful bagels out of the oven, let cool for about 20 minutes, and then, smear with your favorite spread and enjoy!

You can add to the recipe with pretty much anything you want... blueberries, sesame seeds, chocolate chips, etc.
I used the following recipe and it was fantastic. (Pay attention to the bagel rolling video if that part gives you trouble). Let me know if you try it and what toppings or mixes you use!
(I'm not going to lie... I'm totally going to eat one now).
Thursday, February 4, 2010
Lunch Looks
Today I had a tasty little lunch...
Avocados, red peppers, sun dried tomatoes and a smidgen of mayo on fresh baked cheddar parmesan bread.
It was quite good! Though a trifle mild. If I were to do it over again, (as I most certainly will... perhaps in the next ten minutes if I'm going to be honest)... I would probably roast some garlic and spread it onto the bread instead of the mayo.
Since I can't share my actual lunch with y'all today, I'll give you a little visual treat.

Avocados, red peppers, sun dried tomatoes and a smidgen of mayo on fresh baked cheddar parmesan bread.
It was quite good! Though a trifle mild. If I were to do it over again, (as I most certainly will... perhaps in the next ten minutes if I'm going to be honest)... I would probably roast some garlic and spread it onto the bread instead of the mayo.
Since I can't share my actual lunch with y'all today, I'll give you a little visual treat.

Monday, February 1, 2010
Photo Class - Episode 1!
My friend Amy, over at Flexible Dreams, (yes, the same Amy with whom I'm doing Just Make It A Double), is hosting a photo class!
This week, it was learning about and practicing the "rule of thirds". I know what it is, I've known what it is... and this week? I found out that I'm pretty terrible at it. It took constant concentration to put the focal points of my shots into the appropriate places. I don't always shoot central, but I neglect to put the most interesting things in those magic spaces.
But alas, practice makes... well, it made me a smidge better.
So for your viewing, here are the two shots that only made me want to tear my hair out a little bit.

Taken with a Canon Rebel XTi
Focal Length: 50mm
Shutter Speed: 1/250
Aperture: f/1.8
ISO: 400

Taken with a Canon Rebel XSi
Focal Length: 50mm
Shutter Speed: 1/1600
Aperture: f/1.8
ISO: 200
Pain... and practice... it's good for me :)
This week, it was learning about and practicing the "rule of thirds". I know what it is, I've known what it is... and this week? I found out that I'm pretty terrible at it. It took constant concentration to put the focal points of my shots into the appropriate places. I don't always shoot central, but I neglect to put the most interesting things in those magic spaces.
But alas, practice makes... well, it made me a smidge better.
So for your viewing, here are the two shots that only made me want to tear my hair out a little bit.

Taken with a Canon Rebel XTi
Focal Length: 50mm
Shutter Speed: 1/250
Aperture: f/1.8
ISO: 400

Taken with a Canon Rebel XSi
Focal Length: 50mm
Shutter Speed: 1/1600
Aperture: f/1.8
ISO: 200
Pain... and practice... it's good for me :)
Friday, January 8, 2010
Sisters

(originally posted on my joint photo blog with Amy, Just Make it A Double)
Monday, October 26, 2009
Just Make It A Double
A few weeks ago, my friend Amy proposed a new photo project idea for the two of us to embark on together. Every day, we post two photos, one from each of us. We don't show each other the pictures beforehand. Some days we have a theme, such as a color or an idea. But generally, it's just two random photos, placed together by chance.
The results are sometimes surprising. The other day, we found the subjects of our pictures had almost the exact same head tilt. Chance is sometimes funny like that.
So check in on our project, Just Make It A Double. If anything, you'll get to check out some more photos by me and some pretty amazing stuff from Amy.
The results are sometimes surprising. The other day, we found the subjects of our pictures had almost the exact same head tilt. Chance is sometimes funny like that.
So check in on our project, Just Make It A Double. If anything, you'll get to check out some more photos by me and some pretty amazing stuff from Amy.
Sunday, July 12, 2009
Tacit Simplicity - Head Protection Can Be Darn Cute

(M and V, this makes me think of you guys every time Bean wears it. Bunnies!)
Subscribe to:
Posts (Atom)

Subscribe To


 Posts
All Comments
Posts
All Comments
